
 Sign In

 Shop
Shop

 Academy
Broken iPhone REVIVE - Turn A NAND Flash Chip Into A USB Flash Drive
E-waste is most commonly seen in repair shops. Repair technicians might leave a stack of dead logic boards behind after their handwork practice. What you usually do with these logic boards? Throw it away? Wait a minute! You can also turn waste to wealth. Check out our blog today and learn how to turn an iPhone NAND flash chip into a USB flash drive. Say no to e-waste and do something for the environment.
Step 1
We need an iPhone logic board with the NAND flash chip on.
Attach the logic board to the PCB Holder. Heat with the QUICK 858D helical wind hot air gun at 280℃, air flow 5 and remove black adhesive around the NAND first.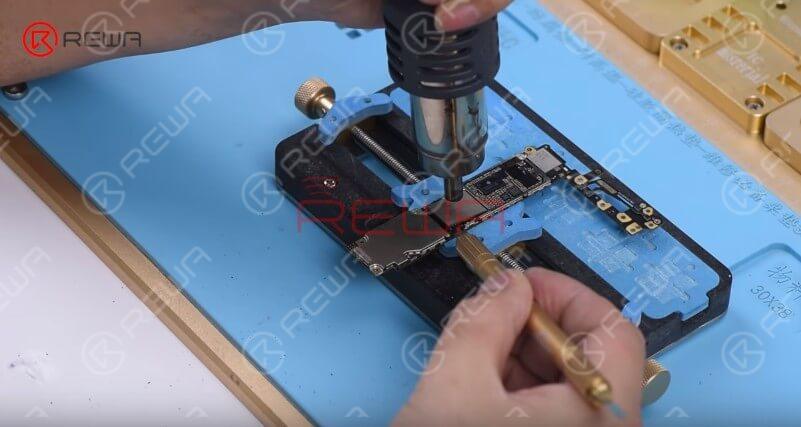
Then set the temperature to 340℃ and continue heating for about 40 seconds. Pry up the NAND flash chip carefully.Continue to attach the NAND flash chip to the PCB Holder. Heat with the QUICK 858D helical wind hot air gun at 300℃, air flow 5 and remove black adhesive on the bonding pad. Clean with PCB Cleaner afterwards.
Step 2
Now we need a bare USB flash drive PCB. We can see that the bare USB flash drive PCB supports 64 Bit NAND Flash Memory Chips and you can solder two NAND flash chips onto its two sides.
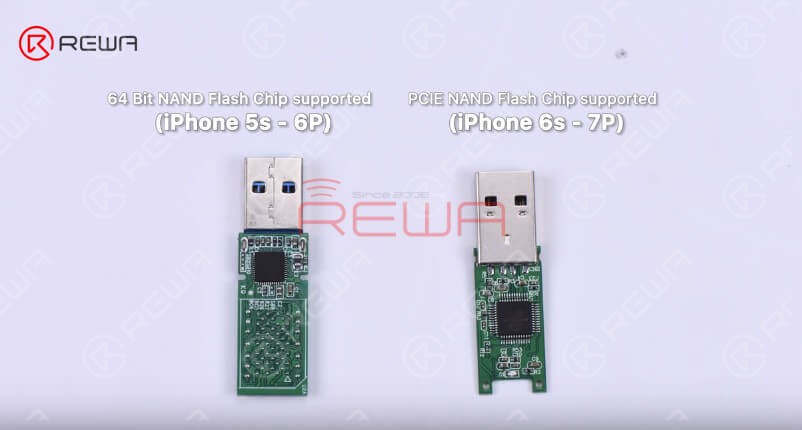
Please be noted that the two NAND flash chips to be soldered should feature the same brand and capacity and the USB flash drive with two NAND flash chips soldered comes with double the storage capacity of one NAND flash chip. For example, two 16G NAND flash chips soldered contributes to a 32G USB flash drive.
If you want only one NAND flash chip soldered onto the bare USB flash drive PCB, then you can only solder the NAND flash chip onto the side where the Mass Storage Controller is located.
Step 3
Attach the bare USB flash drive PCB to the PCB Holder. The PCB has been tinned with solder so we can skip the NAND flash chip reballing process.
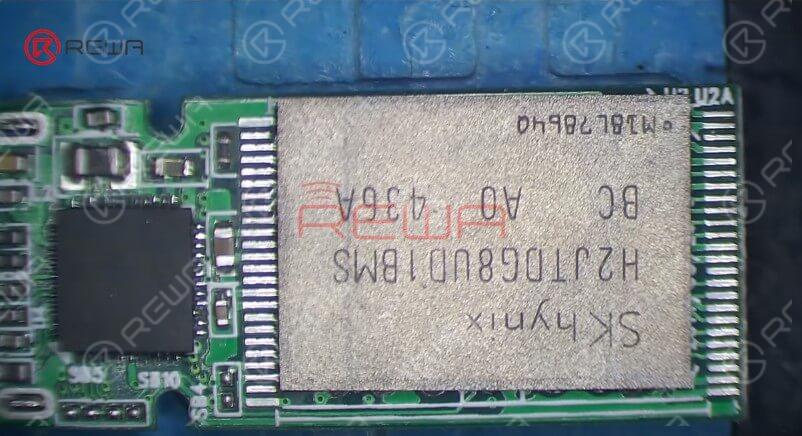
Apply some paste flux to the PCB and get the NAND flash chip in the right position. Solder with QUICK 858D helical wind hot air gun at 330℃, air flow 5. Once done, clean with PCB Cleaner.
Step 4
Plug the USB Flash Drive into the computer.
Open the software matched with the bare USB flash drive PCB. Click ‘Start’.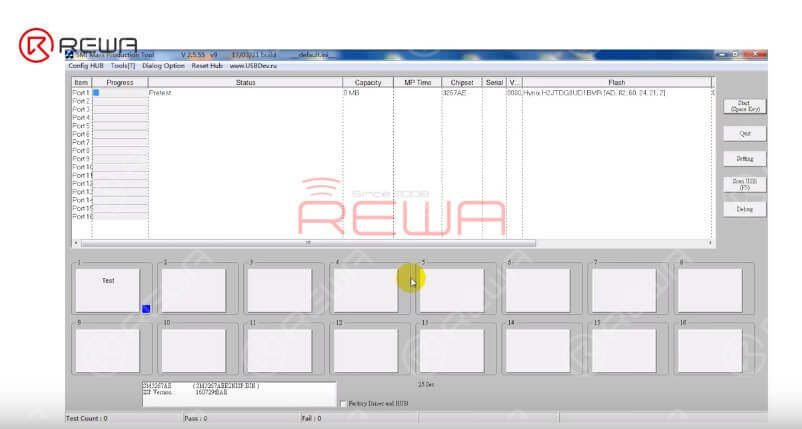
Once finished, locate the USB flash drive on the computer. Select Format on the USB flash drive and choose NTFS in the File System dropdown box.Click Start button and wait until finished.
Step 5
Try to copy files from the computer to the USB flash drive. The USB flash drive works normally.
Assemble the USB flash drive.
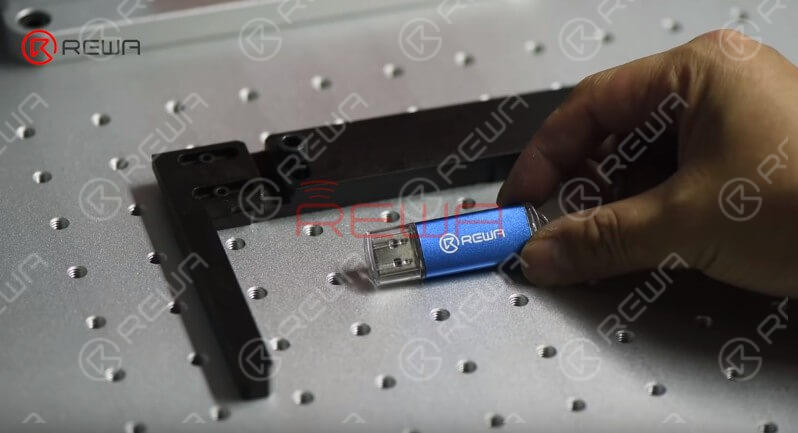
We can also get the USB flash drive imprinted with a customized logo with our laser machine.
Tools & Parts
You can also visit REWA Youtube Channel to check our video and learn how to turn a NAND flash chip into a USB flash drive.
0
0


No Comments
0
0
Share
Apr 23, 2021
ABOUT REWA
REWA is a world leading electronics repair business solutions provider who was founded in 2008 in HongKong. We are committed to delivering one-stop services covering Sourcing Solution, Technical Support Solution as well as Recycle & Resell Solution.


