
 Sign In

 Shop
Shop

 Academy
iPhone 11 Pro Motherboard Separation And Recombination
As we all know, iPhone new series have undergone considerable changes on both inside and outside. Especially on the motherboard. How will these changes affect the repair industry? Will it make third-party repair harder or easier? Follow our iPhone 11 Pro motherboard separation&recombination blog today and find the answer by yourself.
iPhone 11 Pro Motherboard Separation
Compared with iPhone X series, iPhone 11 Pro’s motherboard is smaller with a much denser component array. It is also thicker. There are layers of graphite thermal transfer material on the backside. It can dissipate heat generated from the motherboard efficiently. 
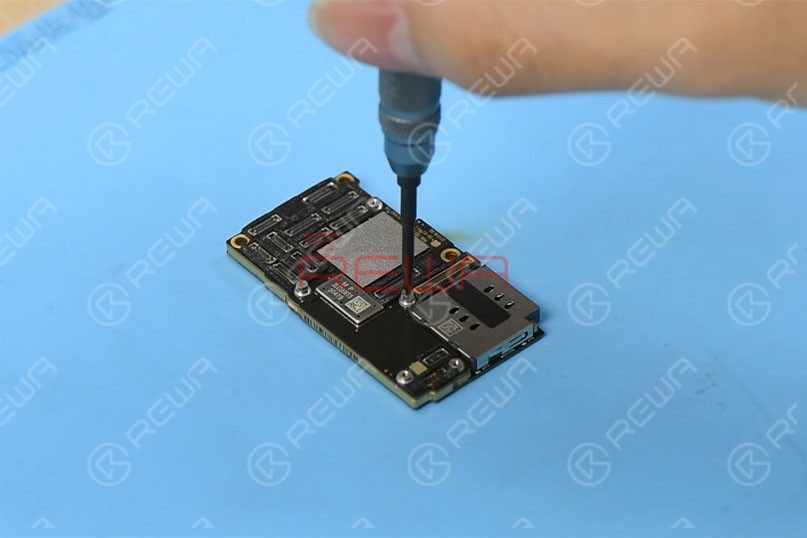
Step 1
Remove the graphite thermal transfer material with tweezers first. To recombine the two layers without reballing after separation, let’s fit two screws into the screw holes reserved on the motherboard.
Step 2
Set temperature of the heating platform at 170℃. With temperature of the platform reaching 170℃, place the motherboard on the platform to heat for 3 minutes. Press the SIM card reader with the tweezers and push the upper layer with another tweezers slightly. 
Step 3
With solder balls on the third space PCB starting to melt, clamp the screws fitted into the screw holes with tweezers and pick up the upper layer with tweezers vertically. Tips: do not shake the tweezers when picking up the upper layer. The third space PCB might be stuck in bridging issues and the recombination work would also be affected.
Continue to pick up the lower layer.
iPhone 11 Pro Motherboard Structure
Now let’s start with the structure of the motherboard.
The Upper Layer
A.Thermal Compound
CPU and areas around CPU are covered with a large amount of thermal compound to dissipate heat generated from A13 CPU.
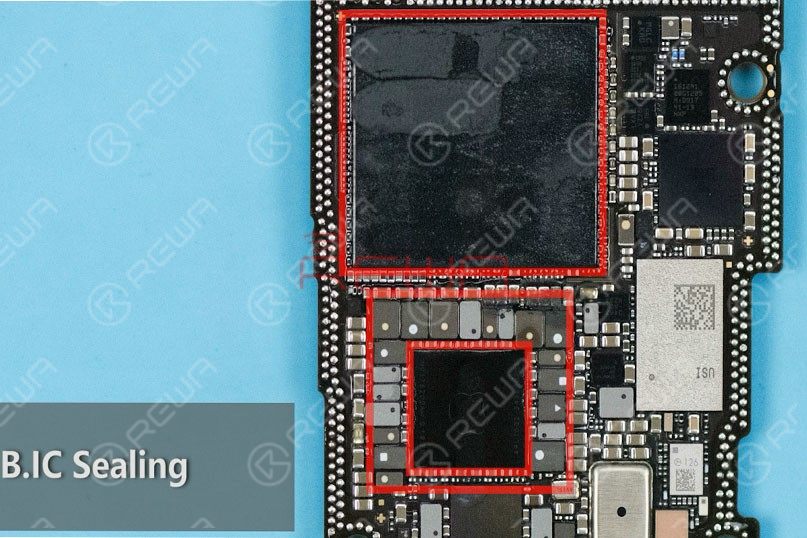
B.IC Sealing
CPU, PMU, and inductors around PMU are sealed with adhesive adding to the difficulty of repairs to some extent.
C.Dense Component Array Around PMU
Professional handwork is required when soldering/desoldering PMU.
D.USB IC
Unlike iPhone X series, the USB IC of iPhone 11 Pro hasn’t been sealed with adhesive, and it is far from CPU. Therefore, the difficulty of USB IC relevant repairs is relatively reduced
E. Unlike iPhone X series, the A13 CPU of iPhone 11 Pro is not located right on the backside of the NAND flash chip. This can reduce the bridging possibility of CPU when soldering/desoldering the NAND flash chip.
The Lower Layer
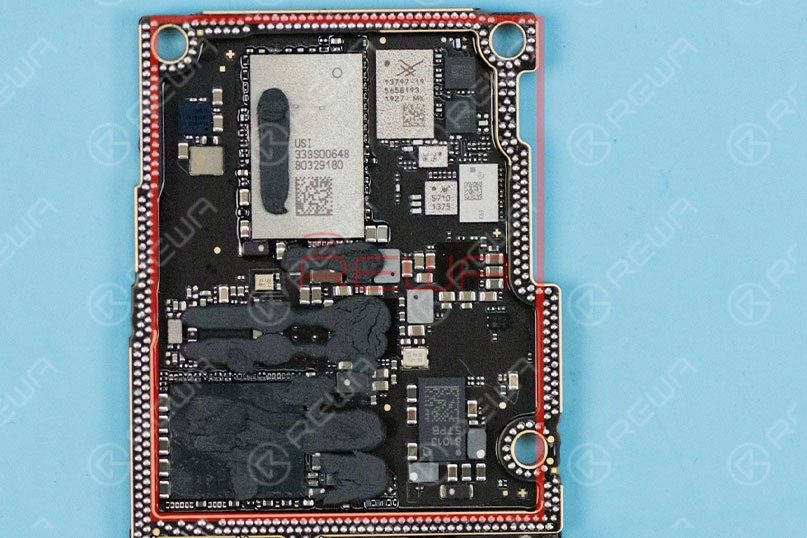
A. Different from iPhone X series, the lower layer of iPhone 11 Pro has a dispersive component array. Therefore, the difficulty of signal relevant repairs is also reduced. B. Unlike iPhone X series, the SIM card reader of iPhone 11 Pro is independent from other components. We don’t have to remove the SIM card reader when working on signal relevant repairs.
iPhone 11 Pro Motherboard Recombination Without Reballing
Set temperature of the heating platform at 170℃. With temperature of the platform reaching 170℃, place the lower layer on the platform to heat for 10 seconds. Apply some Paste Flux to the third space PCB evenly. Get the upper layer in position and heat for about 5 minutes. 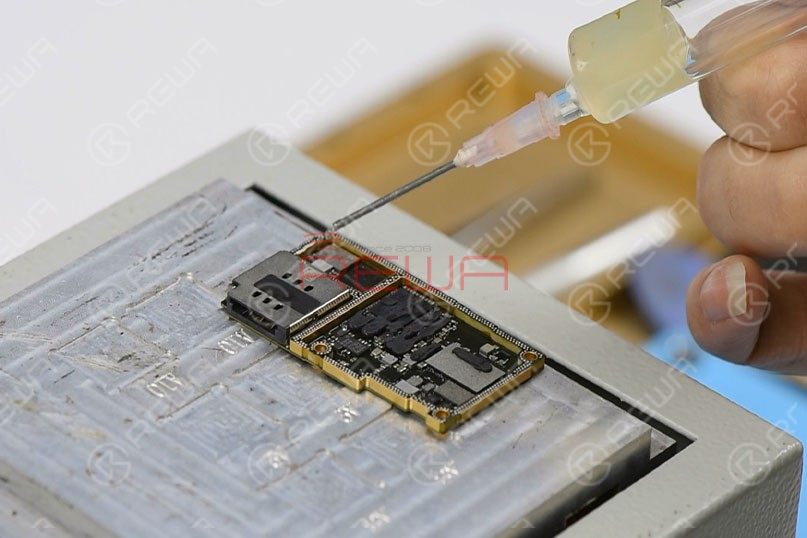
Then, press the SIM card reader with the tweezers and push the upper layer with another tweezers slightly. If the upper layer returns to the previous position automatically, then the soldering process is completed.
Test
Now we can assemble the phone and test.
Get the motherboard and display assembly installed and get the battery connected. Press the power button to turn on the phone. The phone turns on normally. Run function test. All going well.
Summary
The separation&recombination of the motherboard of iPhone 11 Pro shows that the motherboard is smaller and more squared. Compared with the iPhone X series, it will not be easily damaged by external forces. The high integration of the motherboard also means that more professional handwork is required. Overall, the difficulty of iPhone 11 Pro motherboard repairs is reduced.
Tools & Parts
Hot Air Gun Rework Station
Pentalobe Screwdriver
Tri-wing Screwdriver
Integrated Mobile Phone Repair Platform
You can also visit REWA Youtube Channel to check our video of iPhone 11 Pro Motherboard Separation And Recombination.


No Comments
0
0
Share
Apr 23, 2021
ABOUT REWA
REWA is a world leading electronics repair business solutions provider who was founded in 2008 in HongKong. We are committed to delivering one-stop services covering Sourcing Solution, Technical Support Solution as well as Recycle & Resell Solution.


