
 Sign In

 Shop
Shop

 Academy
How to Fix iPhone X Bottom Speaker Not Working
Today we will share how to fix iPhone X bottom speaker not working.
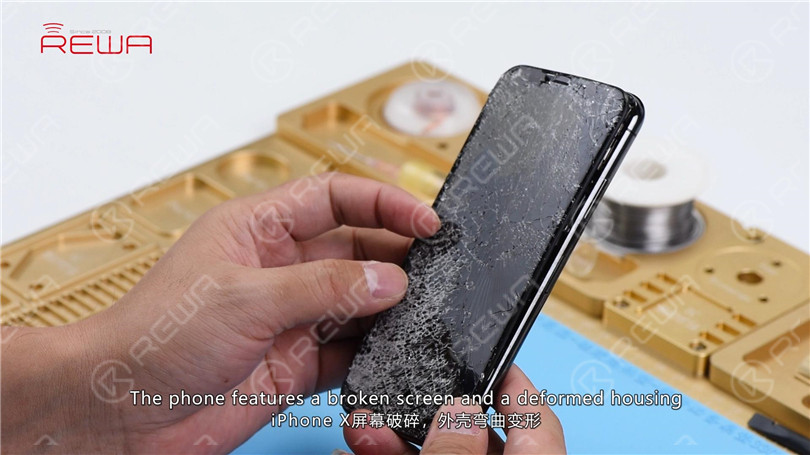
The phone features a broken screen and a deformed housing. Get a new display assembly installed and test. The phone turns on normally. Both the front camera and the rear camera work normally. WiFi also functions well.
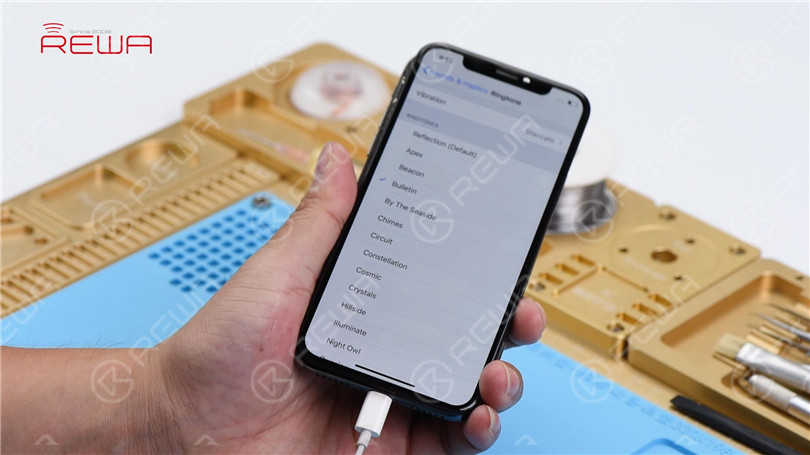
Go to Sounds & Haptics > Ringtone. Select a default ringtone and there is no output sound. But the sound works fine with headphones in.
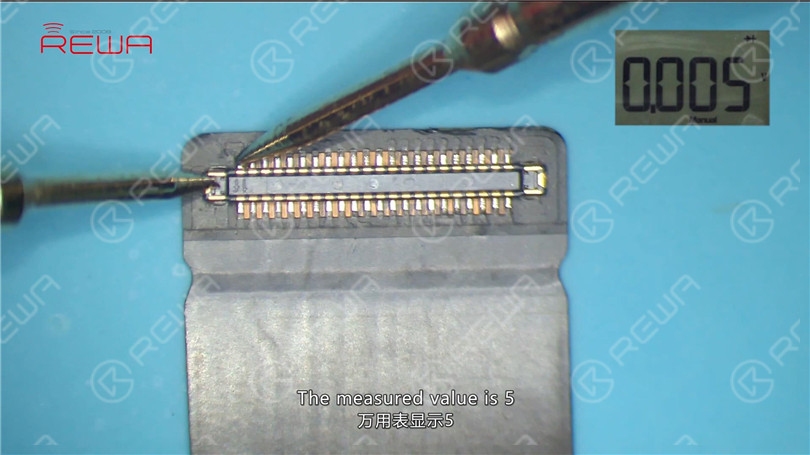
The preliminary judgment is that the audio circuit is in normal condition. It's just that the bottom speaker is not working. Remove the display assembly and disconnect the battery. Disconnect the charging port flex cable. Run diode mode measurement of Pin 1 and Pin 45 of the DOCK connector. The measured value is 5, which indicates that the bottom speaker is in normal condition.
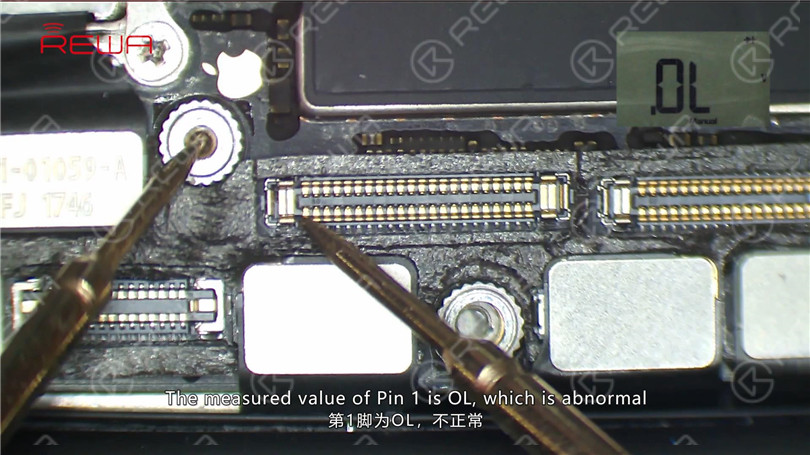
Continue to measure Pin 1 and Pin 45 of the motherboard connector J6400. The measured value of Pin 45 is 602, which is normal.
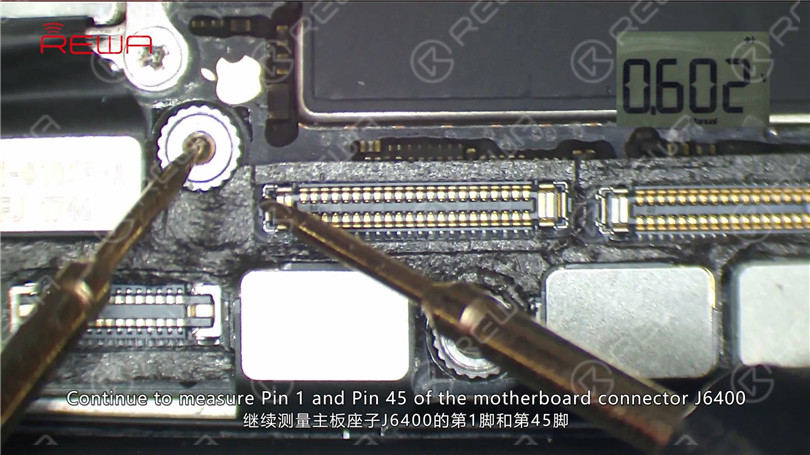
The measured value of Pin 1 is OL, which is abnormal.
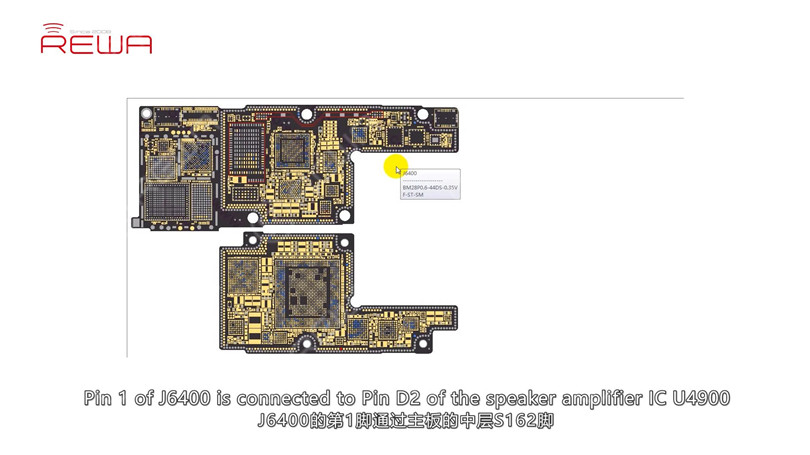
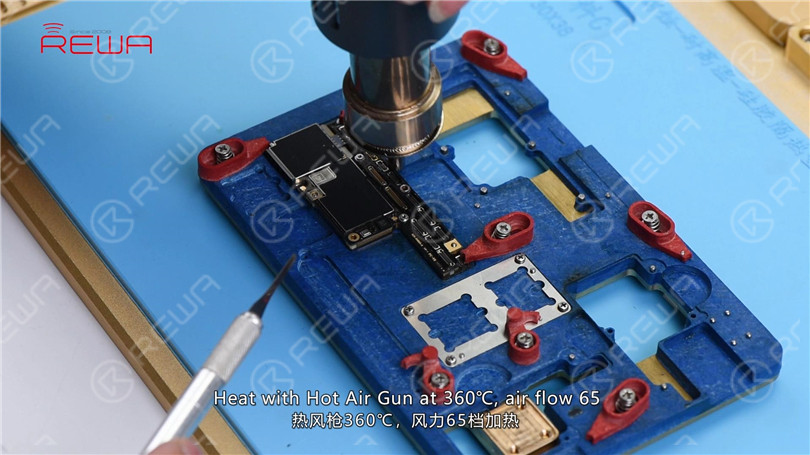
Judging by this, Pin 1 relevant circuit has been open-circuited. Pin 1 of J6400 is connected to Pin 2 of the speaker amplifier IC U4900 by way of Pin S162 on cylinders around the edge of the lower layer. So our next move is to check the circuit carefully. Disconnect flex cables on the motherboard and take out the motherboard. Fix the motherboard to the Holder. Heat with Hot Air Gun at 360℃, air flow 65.
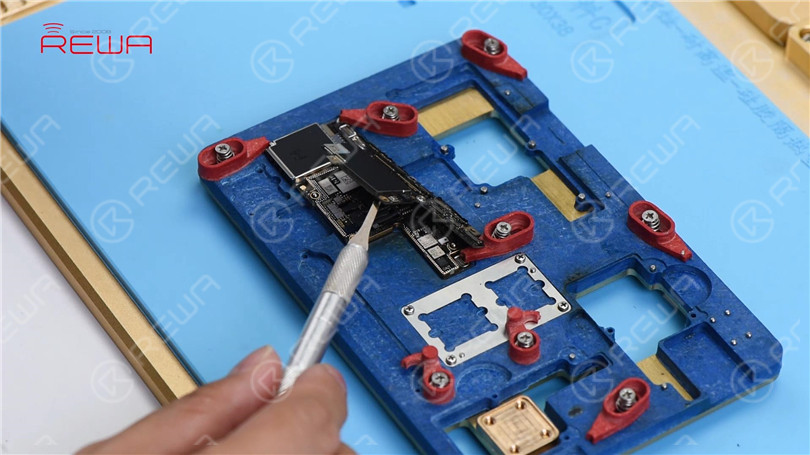
One minute later, pry up the upper layer step by step. Tips: make sure you pry up the upper layer at the right moment when tins on cylinders have melted. We can see clearly that there are multiple missing pins on the upper layer, including Pin S166 of the NFC circuit.
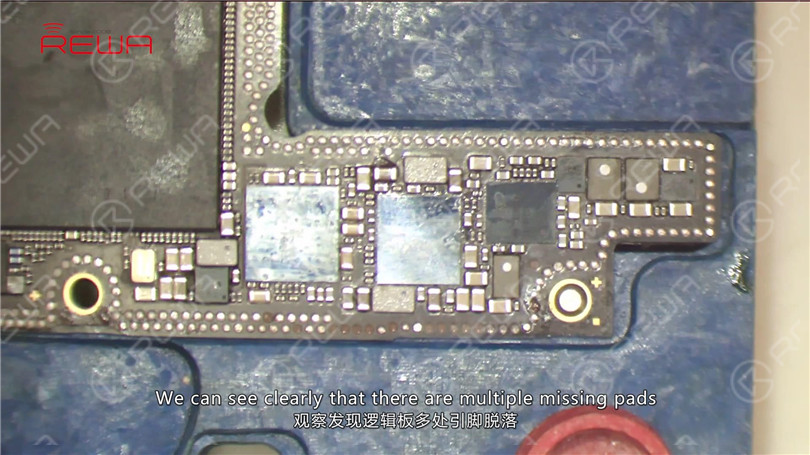
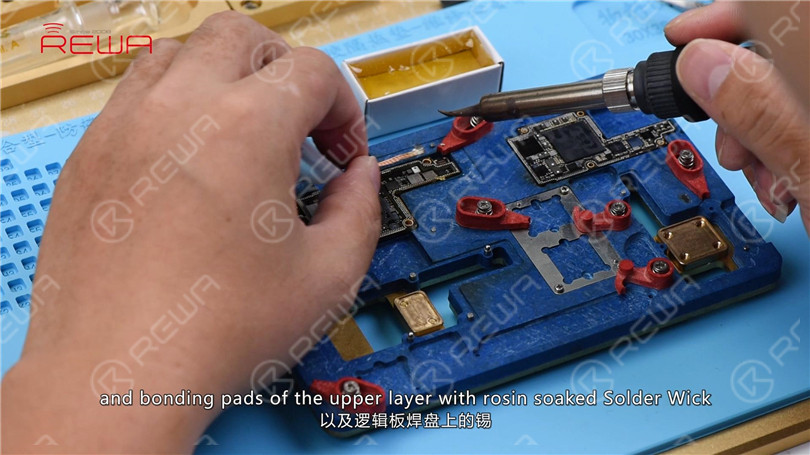
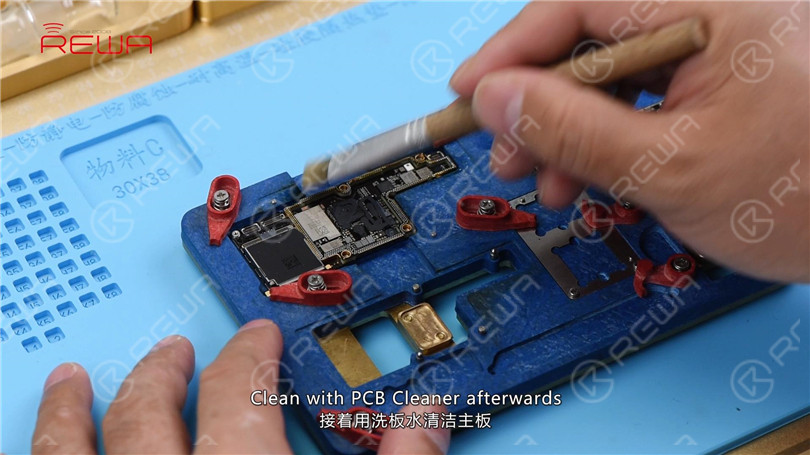
Judging by this, the phone has been dropped, which resulted in pseudo soldering of the motherboard accompanied with the detachment of pins. Since most of those missing pins are ground pins, we can just ignore them. Yet we need to treat Pin S166 with jumper wiring. Remove tins on cylinders around the edge of the lower layer and bonding pads of the upper layer with rosin soaked Solder Wick. Clean with PCB Cleaner afterwards.
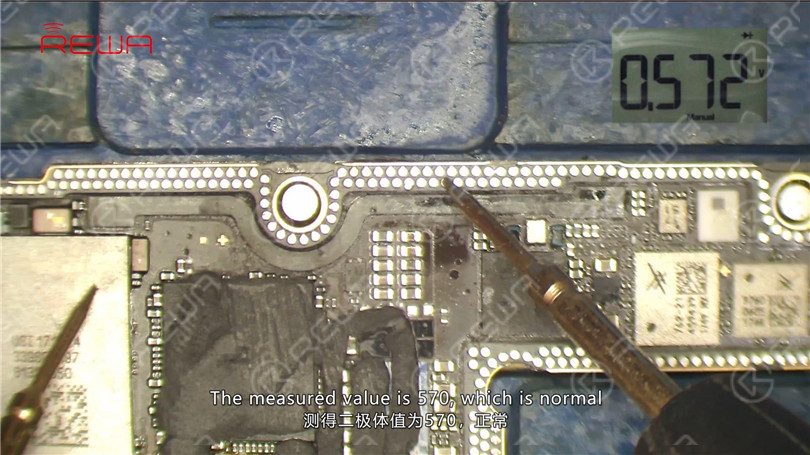
Run diode mode measurement of Pin S162 on cylinders. The measured value is 570, which is normal. Continue to measure Pin S163. The measured value is 570, which is normal. Judging by this, the open-circuited condition of Pin 1 relevant circuit is caused by pseudo soldering of cylinders around the edge of the lower layer.
Now, let's get the motherboard installed to the testing kit. Buckle up the extension flex cable of the display assembly. Then the charging port flex cable and the display assembly. Connect the battery connector with the DC Power Supply. Short Pin 9 of J4300 to the ground with tweezers. The system will then detect power button press. Current reading on the ammeter is normal.

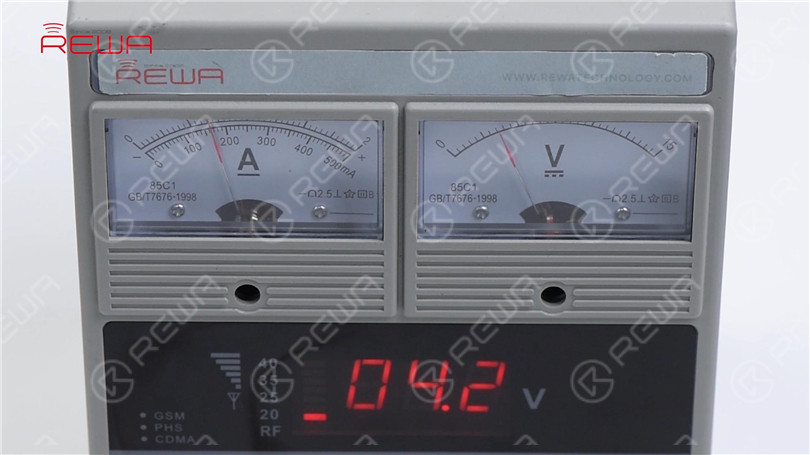
Go to Settings > Sounds & Haptics > Ringtone. Select a default ringtone. Normal output sound this time.

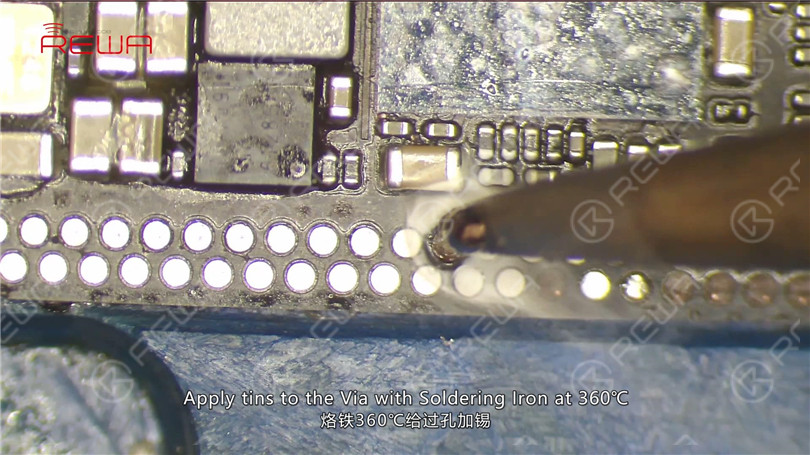
We can confirm now that the upper layer and the lower layer are normal. And the fault is caused by pseudo soldering of cylinders. We can fix the problem by soldering the two layers together. Also before soldering, we need to treat Pin S166 with jumper wiring. Apply tins to the Via with Soldering Iron at 360℃. Prepare a length of tin applied Enameled Copper Wire of 0.02mm in diameter. Solder one end to the tin applied Via.

Clean with PCB Cleaner afterwards. Then apply some UV Curable Solder Mask to the soldered area. And solidify the upper layer under UV Dryer Lamp for 2 minutes.

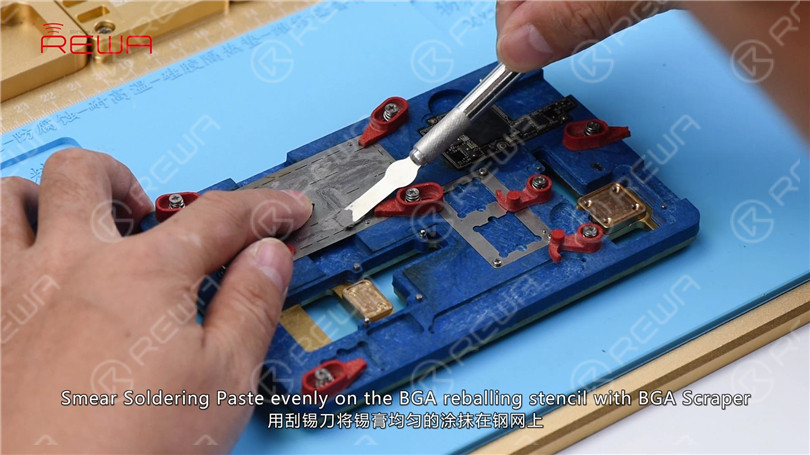
Then get the other end to the right position. Next, attach the lower layer to PCB Holder. Fix the BGA Reballing Stencil to the right position. Smear Soldering Paste evenly on the BGA reballing stencil with BGA Scraper. Wipe out excess Soldering Paste with lint-free wiping cloth.
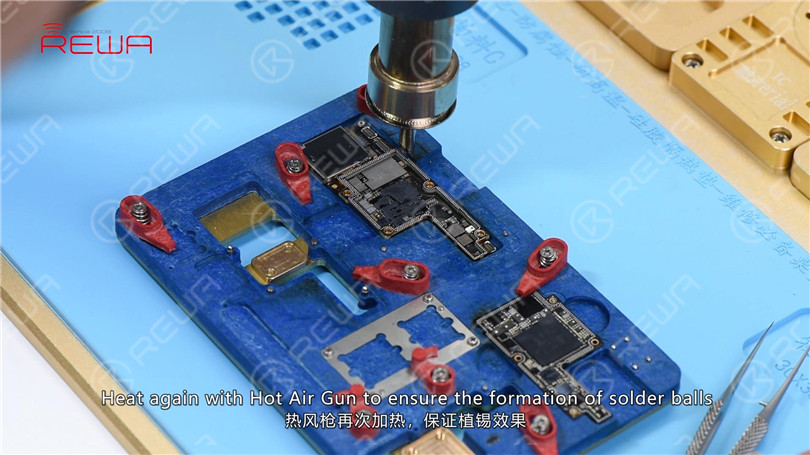
Then heat evenly with Hot Air Gun at 350℃, air flow 35. So that all solder balls can solidify completely. Remove the BGA reballing stencil after 2 minutes. Heat again with Hot Air Gun to ensure the formation of solder balls.
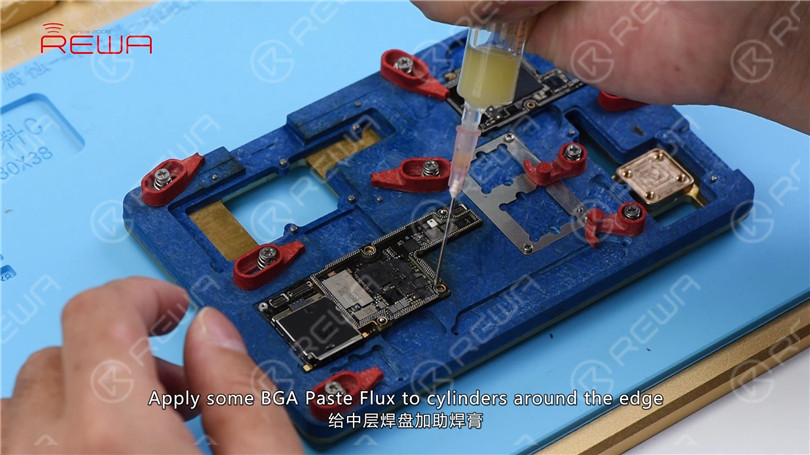
Apply some BGA Paste Flux to cylinders around the edge and get the upper layer in position.
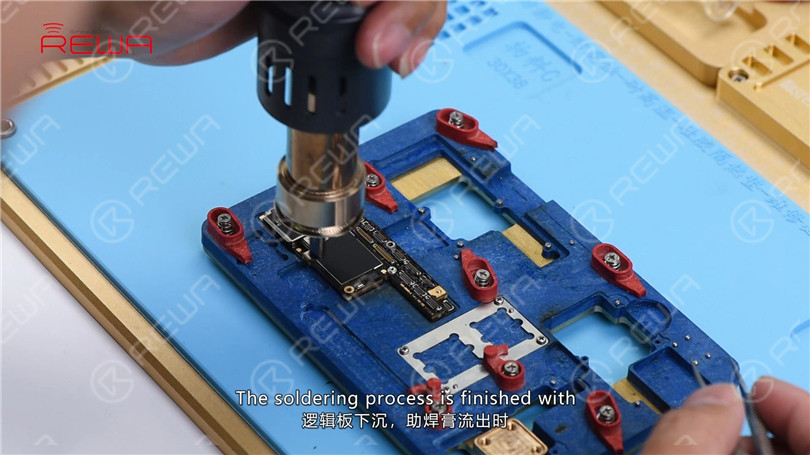
Heat evenly with Hot Air Gun at 350℃, air flow 65. The soldering process is finished with the upper layer sinking and Paste Flux overflowing.
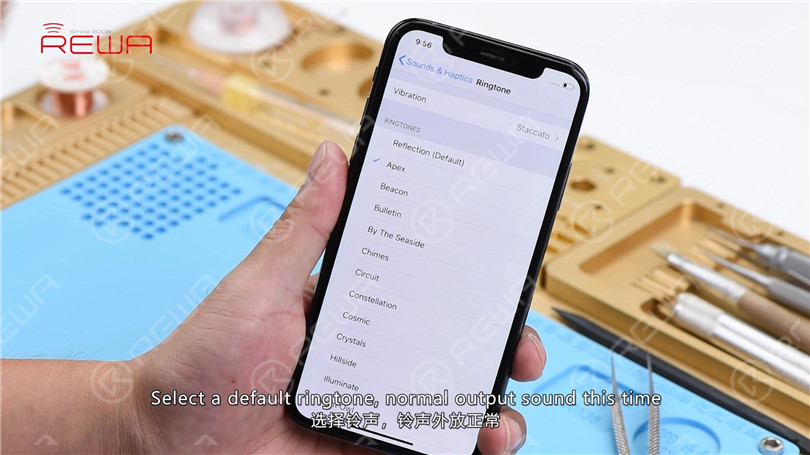
Wait for the motherboard to cool for 5 minutes. Now, let's assemble the phone and test. Go to Settings>Sounds&Haptics>Ringtone. Select a default ringtone, normal output sound this time.


No Comments
0
0
Share
Apr 23, 2021
ABOUT REWA
REWA is a world leading electronics repair business solutions provider who was founded in 2008 in HongKong. We are committed to delivering one-stop services covering Sourcing Solution, Technical Support Solution as well as Recycle & Resell Solution.


